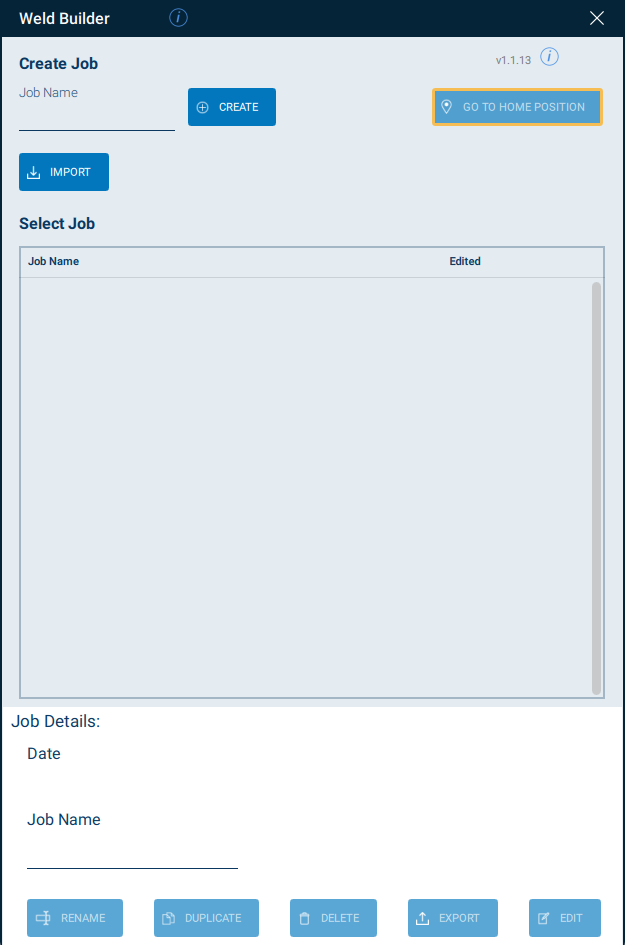
The Job Manager Page allows you to organize Weld Builder jobs and access the Program Page to edit the selected job.
Therefor the Job Manager Page is divided in three parts. At the top you will find the used version and the possibility to move the robot to the set home position by pressing and holding the Go To Home Position button.
It is also possible to create a new job or import an existing one from a USB drive.
The job list in the middle of the page displays the exisiting Weld Builder jobs. In addition, the list contains the information of the last edited date.
In the lower part you can find the Job Details. If a job is selected in the job list, the job name and the last edited date are displayed here again.
This selected job can be customized by renaming, duplicating, deleting, exporting or editing.

Create
A job name can be entered via the text field in the Create Job area. When activating the text field by clicking on it, a keyboard opens, which only shows the allowed characters. After entering a valid name, it can be created by clicking the Create button. The name then appears in the job list below and is automatically selected. This selection displays the job details for this job.
Rename
To rename a job, the corresponding job must be selected in the job list on the Job Manager Page. Afterwards, the job name is displayed again in a text field in the Job Details. By clicking on the text field, a keyboard appears on the Smart Pendant. Using this keyboard, a new name can be entered and changed using the Rename button.
Duplicate
An existing job can be duplicated by selecting the existing job in the job list on the Job Manager Page. This job name will then appear in the Job Details. The Duplicate button creates a job with the name of the existing job and the extension “-COPY”.
Delete
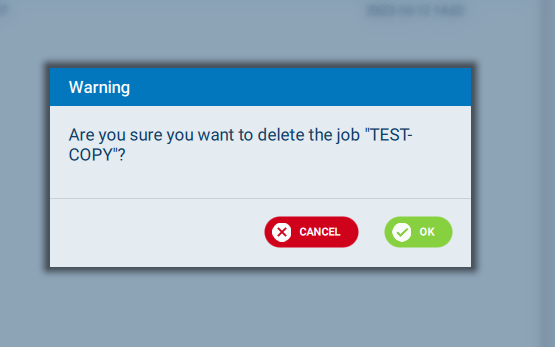
An existing job can be deleted by selecting the existing job in the job list on the Job Manager Page. This job name will then appear in the Job Details. It can then be deleted by clicking the Delete button.

Import
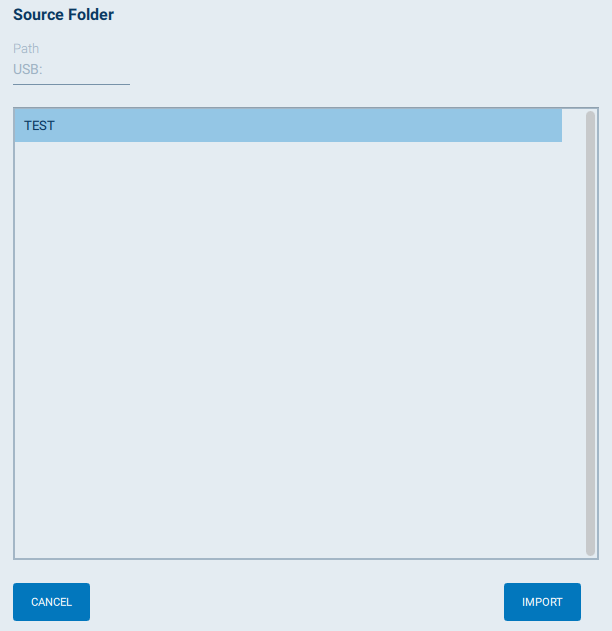
If you want to import a Weld Builder job, click the Import button on the Job Manager page. The import page appears and shows all Weld Builder jobs from the root directory of the USB drive. After selecting the desired job, you can click Import. Otherwise, click Cancel.
Now the Job Manager page appears again and the imported file is listed in the job list.

Export
If you want to export a Weld Builder job, select the desired job in the job list and click the Export button.
Edit
An existing job can be edited by selecting the existing job in the job list on the Job Manager Page. This job name will then appear in the Job Details. With the Edit button you can open the Program Page to edit the selected job.